
Blog
CCR32 Battery Removal Tool: A Comprehensive Guide
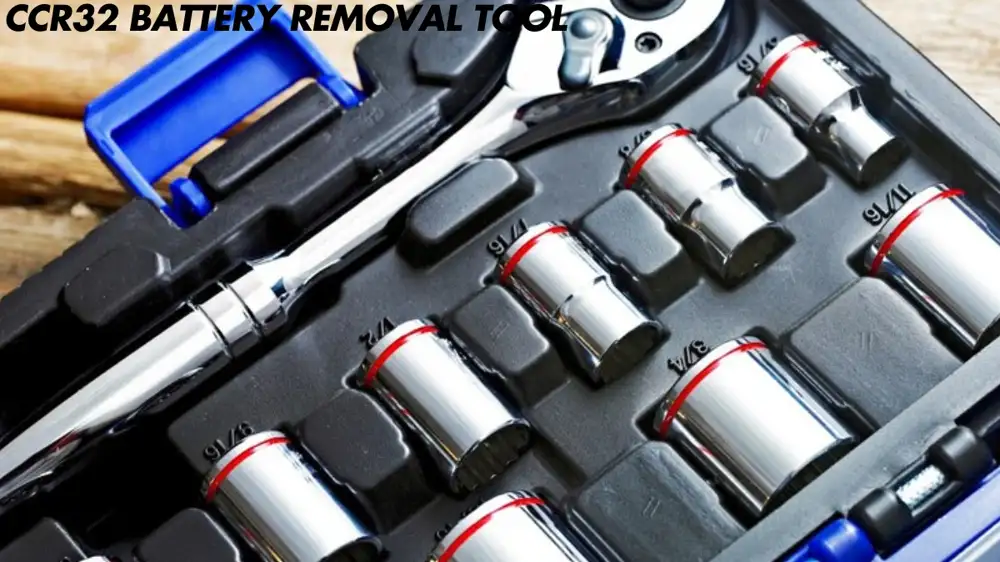
For people who work with batteries in a variety of devices, especially those found in key fobs, medical equipment, and some industrial machines, the CCR32 battery removal tool is a necessary piece of equipment. The purpose, applications, and significance of the CCR32 battery removal tool for both regular users and experts in many disciplines will all be covered in this article. This tutorial will provide you all the knowledge you need, whether you want to learn how to use this tool efficiently or are thinking about adding it to your toolkit.
A CCR32 Battery Removal Tool: What Is It?
The CCR32 battery removal tool is a specialized instrument that aids in the removal of batteries from specific devices, especially those with tiny, frequently challenging-to-remove cells. The term “CCR32” usually designates a particular brand or type of tool used in settings and industries where experts must carefully and precisely remove batteries.
The main purpose of the tool is to remove batteries from their compartments quickly and safely without causing any harm to the battery, the gadget, or the surrounding parts. When the battery is enclosed or difficult to reach with standard hand tools, its design is especially helpful.
A wide range of devices frequently use these tools, such as:
- Fobs for keys
- Aids for hearing
- Tiny medical equipment
- Carry-around devices
- Industrial equipment
The CCR32 is highly known for its accuracy, usability, and effectiveness in a range of settings.
Why Is a CCR32 Battery Removal Tool Necessary?
Depending on the battery type, the design of the device, and the user’s experience, removing batteries from devices may appear straightforward but can actually be a delicate procedure. Improper handling may result in injury, device damage, or battery leakage.
Here are some reasons why the CCR32 battery removal tool is needed:
1. Stops the Device from Being Damaged
Many devices need to be handled carefully, particularly those utilized in sensitive or medical settings. The battery can be taken out of the gadget without causing any harm if a tool like the CCR32 is used. You run the danger of breaking tiny connections, the device’s case, or other internal parts if you don’t have the right equipment.
2. Guarantees Secure Battery Management
When not handled correctly, batteries can be dangerous. Particularly with rechargeable batteries like lithium-ion, a tool like the CCR32 helps remove the battery securely, reducing the chance of harm or exposure to hazardous components or chemicals.
3. Boosts Productivity
Using a CCR32 tool may speed up the process of replacing or maintaining batteries on a regular basis. Compared to utilizing common tools, its precise design allows it to remove batteries more quickly and efficiently, saving you time and lowering the possibility of mistakes.
4. Safeguards Your Hands
It can be challenging to remove batteries from difficult-to-reach locations, particularly if the battery is deeply embedded in a compartment. By removing the need to use your hands or fingers in confined areas, the CCR32 tool helps you avoid pain or injury.
5. Prevents Battery Leakage
The CCR32 tool helps prevent the battery from being squeezed or bursting, which can occur when removing a battery from a tightly made compartment that might cause it to leak or shatter.
How Can I Use a Battery Removal Tool for a CCR32?
It’s easy to use a CCR32 battery removal tool. To guarantee that the removal is accomplished without harming the gadget or the battery itself, caution and attention to detail are necessary. A detailed tutorial on how to use the tool efficiently is provided below:
1. Set Up Your Workspace
Make sure your workspace is tidy, well-lit, and orderly before you begin. To prevent breaking the gadget, use a mat or a soft surface when working with small, delicate parts. To avoid short circuiting or electrical shock, make sure the gadget is turned off.
2. Pick the Proper Tool
Make sure you have the right battery removal tool for your smartphone because there are various versions. Make sure the CCR32 tool is appropriate for the battery you are using because it is frequently unique to particular models or battery kinds.
3. Properly Position the Tool
Place the CCR32 tool in the proper spot in the battery compartment. It should fit tightly around the battery or into a slot specifically designed for removing batteries. Before continuing, ensure it is properly aligned.
4. Gently Remove the Battery
Once the tool is securely in place, apply gentle pressure. The tool should gradually pull the battery free without damaging it. Avoid using excessive force, as that may damage the battery or the device’s internal components.
5. Inspect the Battery and Device
After removing the battery, inspect both the battery and the compartment for any signs of damage, leakage, or corrosion. If you’re replacing the battery, make sure the new battery is installed properly to avoid issues.
6. Clean the Device (Optional)
In some cases, it’s a good idea to clean the device’s battery compartment before inserting a new battery. Use a lint-free cloth or a brush to clear away any dust or debris, which can help ensure that the new battery functions properly.
7. Insert the New Battery (if applicable)
If you are replacing the old battery, carefully place the new one into the compartment. Ensure that the new battery is installed with the correct polarity (positive and negative terminals) to ensure proper function.
Benefits of Using a CCR32 Battery Removal Tool
1. Improved Accuracy
The CCR32 tool provides precision when removing batteries from tightly sealed compartments. It minimizes the risk of misalignment or causing damage to the device, which could be a problem when using regular tools like screwdrivers or pliers.
2. Compact Design
The compact size of the CCR32 tool makes it ideal for use in tight spaces. Devices with small, intricate compartments—like key fobs or hearing aids—often require specialized tools, and the CCR32 fits the bill perfectly.
3. Durability
Generally speaking, CCR32 tools are constructed from sturdy, premium materials.This ensures that the tool can withstand repeated use without wearing out, which makes it a long-term solution for battery removal.
4. Cost-Effective
Although purchasing a specialized tool like the CCR32 may involve initial costs, its longevity and efficiency make it a worthwhile investment for both personal and professional use. Avoiding damage to expensive devices or batteries can save you money in the long run.
5. Versatility
The CCR32 tool is versatile and works across a variety of devices, not just one particular model or brand.This adaptability makes it useful in various fields, from personal electronics repair to industrial maintenance.
Common Applications of the CCR32 Battery Removal Tool
The CCR32 battery removal tool is commonly used in several industries and by everyday consumers.The following are a few of the most popular uses:
1. Key Fob Battery Replacement
Key fobs for cars and homes often contain small, hard-to-reach batteries. The CCR32 tool can quickly and safely remove the battery without causing any damage to the key fob or its internal components.
2. Medical Devices
Many medical devices, such as hearing aids, glucose monitors, and blood pressure cuffs, require frequent battery replacements. The CCR32 tool is an excellent choice for professionals in the healthcare field, as it ensures the safe removal of batteries without damaging sensitive equipment.
3. Consumer Electronics
Small electronics, including remote controls, cameras, and toys, often feature tight battery compartments. The CCR32 battery removal tool ensures that batteries are removed safely without causing wear or tear on the device.
4. Industrial Applications
In industries that rely on specialized tools, machinery, or equipment with battery compartments, the CCR32 tool plays a crucial role. It is used in removing batteries from small machines, tools, and even robotics, where precision is key.
5. Portable Gadgets
For people who frequently use portable gadgets, such as flashlights, GPS devices, and small power tools, the CCR32 is a useful tool for efficient battery replacement.
CCR32 Battery Removal Tool Maintenance
Like any tool, maintaining your CCR32 battery removal tool is essential to ensure its longevity and performance. Here are a few tips for keeping your tool in optimal condition:
- Clean After Each Use: Wipe down the tool after each use to remove any dirt, dust, or debris.
- Check for Damage: Regularly inspect the tool for signs of wear or damage, especially if you use it frequently.
- Store Properly: Store the tool in a dry, safe place to prevent rust or damage. Avoid leaving it in places where it may be exposed to moisture or extreme temperatures.
5 FAQs About the CCR32 Battery Removal Tool: Quick Answers to Your Most Common Questions
- What is the CCR32 battery removal tool used for? The CCR32 battery removal tool safely extracts small, difficult-to-reach batteries from devices like key fobs, medical equipment, and portable gadgets. It ensures efficient battery removal without damaging the device or the battery.
- Why should I use a CCR32 battery removal tool instead of a regular tool?
The CCR32 tool offers precision and safety that regular tools can’t provide. It prevents damage to the device and battery and reduces the risk of injury, especially when dealing with small or hard-to-access battery compartments. - Is the CCR32 battery removal tool suitable for all battery types?
The CCR32 battery removal tool works with many small batteries commonly found in key fobs, hearing aids, and medical devices. However, you must ensure it is compatible with the specific device and battery type you are working with. Always check before use. - Can I replace batteries in medical devices with the CCR32 tool?
Yes, the CCR32 tool is ideal for safely replacing batteries in sensitive medical devices like hearing aids and glucose monitors. It helps avoid damage to the device and ensures safe battery handling. - How do I maintain my CCR32 battery removal tool?
To maintain your CCR32 tool, clean it after each use, check for any damage regularly, and store it in a dry, safe place to prevent wear and rust. Proper care will ensure the tool lasts for a long time.
Conclusion
A highly specialized, effective, and secure instrument, the CCR32 battery removal tool is made for people who regularly work with small devices that need new batteries. It offers a safe, accurate method of extracting batteries from confined spaces or hard-to-reach areas, protecting both the gadget and the user.
You may improve your proficiency with battery-powered gadgets by learning about their significance, uses, and correct usage. Whether you work as a medical technician, an industrial specialist, or a regular user, purchasing a CCR32 battery removal tool is a wise move that will save you time, effort, and lower the chance of harm.
Blog
Paper Screening Based Test Ph-V for DM (B-15) Domicile holders of Nowshera, Charsadda & Malakand District in the E&SED Khyber Pakhtunkhwa [TEST DATE: 1st June’ 2025]
Candidate’s Answer Sheet Section
PST (BPS-12), CT (BPS-15), PET (BPS-15), DM (BPS-15), TT (BS-15)

Key Points
- Research suggests optimizing your LinkedIn profile and engaging with your network can help gain a clients on LinkedIn.
- It seems likely that building relationships through personalized outreach and providing value are effective strategies.
- The evidence leans toward consistency and patience being crucial for success on LinkedIn.
Optimize Your Profile
Start by ensuring your LinkedIn profile is professional and appealing. Use a clear headshot, craft a headline that highlights what you offer, and write a summary showcasing your expertise. This makes you more visible to potential clients.
Build and Engage Your Network
Connect with industry professionals and potential clients, personalizing your requests to increase acceptance. Engage by liking, commenting, and sharing their posts, and join relevant LinkedIn groups to expand your reach.
Reach Out and Provide Value
Send personalized messages to potential clients, focusing on building relationships rather than selling immediately. Share useful content, offer free resources, or host webinars to demonstrate your expertise and build trust.
Move Conversations Offline and Be Consistent
Once you’ve built rapport, suggest a call or meeting to discuss how you can help. Stay consistent with daily engagement, as gaining clients on LinkedIn takes time and persistence.
Detailed Strategies for Gaining Clients on LinkedIn
This section provides a comprehensive guide based on extensive research into LinkedIn client acquisition strategies, drawing from multiple authoritative sources. The following details expand on the key points, offering a step-by-step approach for users looking to leverage LinkedIn effectively.
Profile Optimization: The Foundation for Visibility
Your LinkedIn profile is your digital storefront, and optimizing it is critical for attracting clients. Use a professional headshot to make a strong first impression, as profiles with photos receive more views. Craft a compelling headline that clearly states your value proposition, such as “Freelance Graphic Designer Helping Brands Stand Out” rather than a generic title like “Designer.” The summary should highlight your expertise, past achievements, and what you offer, using relevant keywords to improve search visibility. For example, if you’re targeting marketing agencies, include terms like “digital marketing,” “brand strategy,” and “client growth.”
Research from Dripify: How to Get Clients From LinkedIn emphasizes using SEO techniques, such as incorporating keywords in your headline and summary, to ensure your profile appears in searches. Additional resources, such as Dripify: Improve LinkedIn Profile and Dripify: LinkedIn SEO, provide detailed tips on enhancing visibility.
Identifying and Targeting Ideal Clients
To gain clients, you must first define your ideal customer avatar. This involves identifying their industry, job titles, and pain points. For instance, if you’re a web developer, target marketing managers in e-commerce firms. Use LinkedIn’s advanced search to filter by keywords, location, and industry, and consider Boolean operators (e.g., “web development” AND “e-commerce”) for refined results, as suggested by Dripify: Boolean Search on LinkedIn.
For advanced targeting, LinkedIn Sales Navigator offers features like lead recommendations and saved leads, though it’s a paid tool. The LinkedIn Sales Blog: 7 Steps to Attract More Clients With LinkedIn recommends using Sales Navigator for criteria like title and industry, with insights from LinkedIn: How to Use Sales Navigator.
Building and Engaging Your Network
Networking is at the heart of LinkedIn client acquisition. Start by connecting with colleagues, former clients, and industry leaders, personalizing each request to increase acceptance rates. For example, mention a shared interest or connection in your message. Engage with your network by liking, commenting, and sharing their posts, which helps build rapport.
Participating in LinkedIn groups is another effective strategy. Join groups relevant to your industry, such as “Digital Marketing Professionals,” and contribute by answering questions or sharing insights. Dripify: LinkedIn Groups highlights this as a way to connect with potential clients. Additionally, publishing thought leadership content, such as LinkedIn Articles addressing audience pain points, can position you as an expert. An example is the article “5 Game-Changing Digital Marketing Strategies for Small Businesses,” as noted in Dripify: LinkedIn Articles.
Personalized Outreach and Relationship Building
Once connected, avoid the mistake of immediate pitching, which can alienate potential clients. Instead, send personalized messages that focus on building relationships. For instance, ask about their current challenges or share a relevant article. The LinkedIn Sales Blog advises speaking like a human, finding commonalities, and following advice from experts like Will Allred on communication, available at LinkedIn: Don’t Pitch and Connect.
The DigitalMarketer: Build a Steady Stream of Clients suggests a non-salesy welcome message, including a question like “Tell me something interesting about your work,” to drive engagement. This approach, informed by Ted Prodromou’s book Ultimate Guide to LinkedIn for Business, emphasizes helping without expecting immediate returns, pretending you’re at a coffee meeting.
Providing Value to Build Trust
Providing value is crucial for converting connections into clients. Share resources, guides, or e-books that address your target audience’s pain points. For example, host a webinar on “Effective Social Media Strategies for Small Businesses” to showcase your expertise. Dripify: Create Value for Customers offers ideas like sharing case studies or hosting workshops.
Engaging in conversations is also key—be proactive by offering insights on posts or articles, and ask questions to spark dialogue. This builds trust and positions you as a helpful resource, as noted in Dripify: How to Get Clients From LinkedIn.
Moving Conversations Offline and Closing Deals
After building rapport, transition relationships offline by suggesting a phone call or virtual meeting. The DigitalMarketer process includes inviting responders to a short call, asking, “Would you like my help?” at the end, and closing deals via these interactions. The LinkedIn Sales Blog emphasizes demonstrating credibility before moving offline, ensuring you’ve established value.
Leveraging Recommendations and Referrals
Recommendations enhance your profile’s credibility, making it easier to attract clients. Ask satisfied clients or colleagues for recommendations, highlighting specific projects. For example, request, “Could you recommend me based on our recent website redesign project?” Follow up with gratitude, as outlined in Dripify: LinkedIn Recommendations, which lists five steps: identify connections, personalize, highlight relationships, be specific, and express gratitude.
Additionally, leverage your existing network for referrals. Reach out to former colleagues or friends, personalizing messages to seek introductions, as suggested in Dripify: How to Get Clients From LinkedIn.
Consistency and Patience: The Long-Term Approach
Gaining clients on LinkedIn requires consistency. Dedicate 30 minutes daily to engage, as per the DigitalMarketer 8-step process, which includes connecting, messaging, and following up. The LinkedIn Sales Blog stresses building your reputation over time, with success stories like Darren McKee, who gained 1,000 followers per week by posting consistently for over 1,000 days, detailed at LinkedIn: Posted on LinkedIn 950 Days Straight.
Patience is key, as results take time. The Dripify article notes LinkedIn’s 800 million members worldwide offer immense potential, but building relationships is a gradual process.
Additional Strategies for Advanced Users
For those looking to scale, consider using LinkedIn automation tools like Dripify for connection requests and follow-ups, ensuring compliance with LinkedIn’s policies, as detailed at Dripify: LinkedIn Automation Tools. Optimize your Social Selling Index (SSI) for better performance, with tips at Dripify: LinkedIn SSI Score. Drive traffic to your website via your profile link, share content, and use LinkedIn ads for broader reach, as noted in Dripify: Increase Website Traffic Using LinkedIn.
Collaborate with influencers for guest posts or joint webinars to expand your audience, as suggested at Dripify: Digital Marketing Experts. For hidden profiles, use LinkedIn X-Ray Search, detailed at Dripify: LinkedIn X-Ray Search.
Tables: Key Strategies and Tools
Below is a table summarizing the core strategies, with corresponding tools and resources:
| Strategy | Description | Tools/Resources |
|---|---|---|
| Profile Optimization | Enhance visibility with professional photo, headline, summary, keywords. | Dripify: Improve LinkedIn Profile, Dripify: LinkedIn SEO |
| Network Building | Connect with professionals, personalize requests, engage via likes/comments. | Dripify: Self-Entrepreneur LinkedIn |
| Group Engagement | Join industry groups, participate in discussions, share expertise. | Dripify: LinkedIn Groups |
| Content Publishing | Share articles addressing pain points, engage in comments. | Dripify: LinkedIn Articles |
| Advanced Search | Use keywords, filters, Boolean operators for targeted searches. | Dripify: Boolean Search on LinkedIn |
| Sales Navigator | Advanced filters, lead recommendations, InMail for direct messaging. | Dripify: How to Use LinkedIn Sales Navigator |
| Recommendations | Request from clients, highlight projects, express gratitude. | Dripify: LinkedIn Recommendations |
| Value Provision | Share resources, host webinars, address audience challenges. | Dripify: Create Value for Customers |
Another table for daily engagement, based on the 8-step process:
| Step | Daily Action | Time Estimate |
|---|---|---|
| 1 | Identify ideal customer, use worksheet for targeting. | 5 minutes |
| 2 | Define problems you solve, focus on results. | 5 minutes |
| 3 | Optimize profile, ensure headline and summary attract clients. | 5 minutes |
| 4 | Connect, send non-salesy messages, include questions. | 5 minutes |
| 5 | Keep in touch, share relevant content every few months. | 5 minutes |
| 6 | Invite to calls, ask if they need help, close deals. | 5 minutes |
| 7 | Build authority, write recommendations, prompt reciprocation. | 5 minutes |
| 8 | Repeat steps 4-7 daily, maintain consistency. | Ongoing |
Success Stories and Statistics
Success stories underscore the potential of these strategies. Darren McKee’s consistent posting for over 1,000 days resulted in 1,000 followers per week, as detailed at LinkedIn: Posted on LinkedIn 950 Days Straight. The DigitalMarketer process helped create a six-figure business, with Ted Prodromou’s book Ultimate Guide to LinkedIn for Business providing further insights. LinkedIn’s 800 million members, as noted in Dripify, offer a vast pool for client acquisition.
Conclusion
Gaining clients on LinkedIn is a multifaceted process requiring profile optimization, targeted networking, engagement, and consistent effort. By following these strategies, users can build relationships, provide value, and ultimately secure clients, with patience being essential for long-term success.
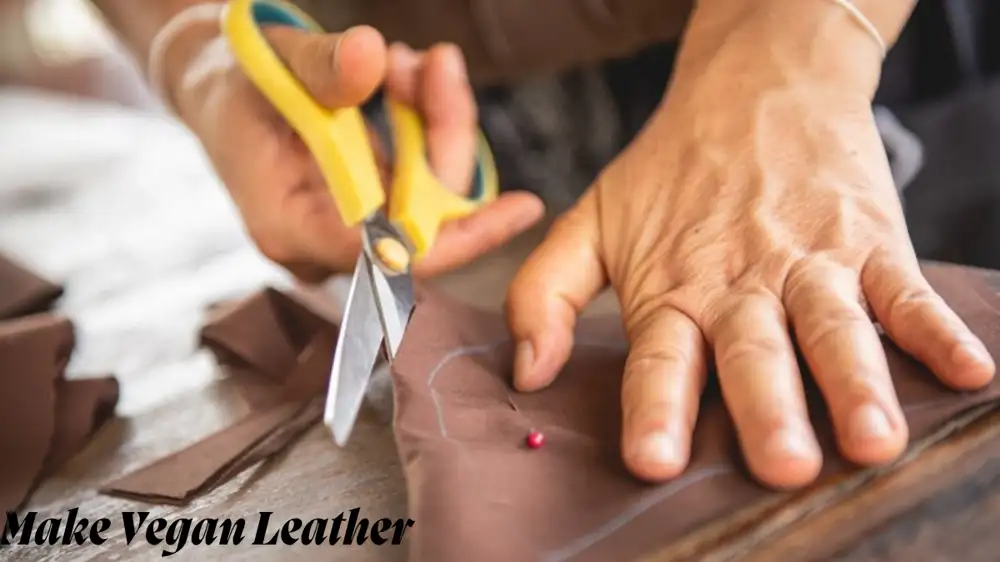
In recent years, vegan leather has become a cruelty-free and eco-friendly alternative to traditional animal leather. But did you know you can take sustainability a step further by creating vegan leather from recycled materials? This innovative approach reduces waste, lowers carbon footprints, and empowers you to craft stylish, durable goods at home.
This guide explores simple, creative methods to make vegan leather using everyday recycled items like plastic bottles, cork, pineapple leaves, and more. Let’s dive in!
Why Choose Vegan Leather from Recycled Materials?
Traditional leather production harms the environment through deforestation, water pollution, and methane emissions from livestock. Vegan leather offers a compassionate alternative, but many store-bought options rely on synthetic plastics like PVC, which aren’t biodegradable.
By using recycled materials, you:
- Reduce landfill waste (e.g., repurposing plastic bottles or fruit scraps).
- Save resources (no need for virgin plastics or animal farming).
- Create customizable, unique textures (each material has its look and feel!).
Whether you’re a DIY enthusiast or a sustainability advocate, making vegan leather at home is a fun, impactful project.
Materials You Can Use to Make Vegan Leather
Almost any flexible, durable recycled material can become vegan leather! Here are the most popular options:
- Recycled Plastic (rPET): Plastic bottles, packaging, or old polyester fabrics.
- Cork: Wine corks, corkboard scraps, or industrial cork waste.
- Plant-Based Fibers: Pineapple leaves (Piñatex), apple peels, or mushroom mycelium.
- Upcycled Fabrics: Denim, canvas, or rubber from old tires.
Each material requires slightly different techniques. Below, we’ll break down five easy methods.
Method 1: Recycled Plastic Bottle Leather (rPET)
Materials Needed:
- Clean plastic bottles (PET)
- Scissors or craft knife
- Non-toxic adhesive (e.g., cornstarch glue)
- Baking parchment
- Iron or heat press
Steps:
- Prepare the Plastic:
Cut bottles into flat sheets. Remove labels and caps, then slice vertically. Flatten the pieces and trim the edges. - Create Layers:
Overlap plastic pieces on baking parchment. Apply adhesive between layers to bond them. - Press and Heat:
Cover with another parchment sheet. Iron at medium heat (150°C/300°F) for 10–15 seconds, applying even pressure. Repeat until layers fuse into a flexible sheet. - Finish:
Let cool. Sand edges for smoothness, or dye with natural pigments for color.
Best For: Bags, wallets, and accessories. rPET leather is water-resistant and sturdy!
Method 2: Cork Leather from Wine Corks
Materials Needed:
- Wine corks (10–15 for a small sheet)
- Food processor or grater
- Non-toxic binder (flour paste or eco-friendly glue)
- Rolling pin
- Wax paper
Steps:
- Shred the Corks:
Grate corks into fine granules using a food processor. Avoid plastic-backed corks. - Mix with Binder:
Combine cork granules with binder until it forms a dough-like consistency. - Roll and Dry:
Place the mixture between wax paper sheets. Roll flat (3–5mm thick). Air-dry for 24–48 hours. - Seal (Optional):
Brush with beeswax or linseed oil for a polished, water-resistant finish.
Best For: Notebook covers, coasters, or jewelry. Cork is lightweight and naturally textured.
Method 3: Pineapple Leaf Leather (Piñatex)
Materials Needed:
- Pineapple leaves (from 5–6 pineapples)
- Blender
- Natural dye (optional)
- Cornstarch or agar-agar (as a binder)
- Mesh screen or cloth
Steps:
- Extract Fibers:
Boil leaves for 30 minutes to soften. Scrape off pulp with a knife, revealing long fibers. Rinse and dry. - Blend and Bind:
Mix fibers with 1 cup water and 2 tbsp binder in a blender. Pour onto a mesh screen to form a thin layer. - Dry and Press:
Sun-dry for 2–3 days, pressing occasionally with a heavy book to flatten.
Best For: Shoes, belts, or upholstery. Piñatex has a rustic, fibrous appearance.
Method 4: Mushroom Leather (Mycelium)
Materials Needed:
- Mushroom mycelium starter kit (available online)
- Organic substrate (sawdust or straw)
- Baking tray
- Dehydrator or oven
Steps:
- Grow Mycelium:
Spread the substrate in a tray. Inoculate with mycelium spores. Store in a dark, humid place for 2–3 weeks. - Harvest and Press:
Once fully grown, peel the mycelium mat from the substrate. Press between boards to flatten. - Tan and Dry:
Soak in a natural tannin (like oak gall solution) for 1 hour. Dehydrate at 40°C (104°F) until leathery.
Best For: High-fashion items. Mycelium leather is biodegradable and mimics animal leather’s softness.
Method 5: Apple Peel Leather
Materials Needed:
- Apple peels (from 10–12 apples)
- Blender
- Glycerin or vegetable glycerin
- Baking sheet
Steps:
- Blend Peels:
Puree peels with 1 tbsp glycerin until smooth. - Spread and Dry:
Pour the mixture onto a baking sheet lined with parchment. Dry in sunlight or an oven at 50°C (120°F) for 8–12 hours. - Finish:
Peel off the sheet. Condition with coconut oil for flexibility.
Best For: Small accessories or decorative patches. Apple leather has a fruity scent and matte finish.
Customizing Your Vegan Leather
Make your creations stand out with these tips:
- Dyeing: Use turmeric (yellow), beet juice (pink), or spirulina (green).
- Embossing: Press leaves or lace into the material before drying.
- Stitching: Reinforce edges with upcycled thread or hemp cord.
Caring for Vegan Leather
- Cleaning: Wipe with a damp cloth. Avoid harsh chemicals.
- Storage: Keep in a cool, dry place to prevent mold.
- Repair: Patch tears with adhesive or a matching material piece.
Environmental Impact and Challenges
Pros:
- Reduces plastic and organic waste.
- Uses less water and energy than animal leather.
Cons:
- Some methods require practice to perfect.
- Plant-based leathers may be less durable than synthetics.
5 FAQs about How to Make Vegan Leather from Recycled Materials
1. Can I make vegan leather at home without specialized equipment?
Answer: Absolutely! Many methods for making vegan leather from recycled materials require only basic household items like scissors, a blender, an iron, or a baking sheet. For example, creating cork leather or apple peel leather can be done with minimal tools. While some techniques, like growing mushroom leather, may need a starter kit, most DIY vegan leather projects are beginner-friendly and don’t require expensive equipment.
2. How durable is vegan leather made from recycled materials compared to traditional leather?
Answer: The durability of vegan leather depends on the materials and methods used. For instance, recycled plastic bottle leather (rPET) is highly durable and water-resistant, making it ideal for bags and accessories. On the other hand, plant-based options like pineapple or apple leather may be softer and better suited for lightweight items. While vegan leather may not always match the longevity of traditional leather, proper care (like sealing and conditioning) can significantly extend its lifespan.
3. Is vegan leather from recycled materials biodegradable?
Answer: It depends on the materials used. Plant-based vegan leathers, such as those made from pineapple leaves, cork, or mushroom mycelium, are biodegradable and compostable. However, vegan leather made from recycled plastics (like rPET) is not biodegradable, though it still helps reduce waste by repurposing existing materials. If biodegradability is a priority, opt for natural, plant-based options.
4. Can I scale up DIY vegan leather production for small businesses?
Answer: Yes, you can! Many of the methods described in the article, such as using pineapple leaves or recycled plastics, can be scaled up with some adjustments. For example, investing in a heat press for rPET leather or a dehydrator for mushroom leather can streamline production. Additionally, sourcing bulk recycled materials and experimenting with efficient techniques can help you create consistent, high-quality vegan leather for a small business.
5. What are the best ways to dye vegan leather naturally?
Answer: Natural dyes are a great eco-friendly option for coloring vegan leather. You can use ingredients like turmeric (for yellow), beet juice (for pink), spirulina (for green), or coffee grounds (for brown). Simply mix the dye with water, apply it to the material using a brush or sponge, and let it dry. For a more vibrant color, repeat the process or add a natural fixative like vinegar. This approach is safe, sustainable, and adds a unique touch to your creations.
Final Thoughts
Creating vegan leather from recycled materials is a rewarding way to support sustainable fashion. Whether you’re crafting a wallet from plastic bottles or a chic bag from pineapple leaves, each project makes a difference. Ready to start? Gather your materials, experiment with textures, and share your creations to inspire others!
By embracing DIY vegan leather, you’re not just making accessories—you’re shaping a greener future.
Most People ask questions on Google about How to Make Vegan Leather from Recycled Materials
What is the process of making vegan leather?
Vegan leather is made without animal hides and instead uses plant-based or synthetic materials. The process varies depending on the type of material used but generally follows these steps:
- Material Sourcing – Vegan leather can be made from plants like mushrooms, pineapples, apples, cacti, or synthetic materials like polyurethane (PU).
- Processing & Treatment – Plant fibers are extracted and mixed with binders or resins to create a durable, leather-like texture. In synthetic versions, plastic is melted and spread into thin layers.
- Shaping & Drying – The material is shaped into sheets and left to dry. This stage determines its thickness and flexibility.
- Texturizing & Coloring – To mimic real leather, the material is embossed with a grain pattern and dyed using eco-friendly or synthetic dyes.
- Finishing Touches – A protective coating is applied for durability, water resistance, and longevity.
How do you make vegan plant-based leather?
Plant-based vegan leather is made using natural materials and fewer chemicals compared to synthetic alternatives. The process depends on the plant source but generally includes:
- Collection & Processing – Fruit waste (pineapple leaves, apple peels, etc.), cactus, or mushrooms are harvested and dried.
- Fiber Extraction & Blending – The plant fibers are broken down and mixed with natural binders like starch or plant-based resins to form a leather-like sheet.
- Shaping & Texturing – The material is rolled out, textured, and sometimes reinforced with fabric backings for extra strength.
- Tanning & Dyeing – The sheets are treated with natural tannins (from tree bark, for example) and dyed with plant-based or non-toxic dyes.
- Finishing – A protective, biodegradable coating is applied for durability and water resistance.
Popular plant-based vegan leathers include Piñatex (pineapple leather), Mylo (mushroom leather), and Desserto (cactus leather).
How do you recycle vegan leather?
Recycling vegan leather depends on its materials:
- Plant-based vegan leather is biodegradable, meaning it will naturally break down over time. Some types can be composted in industrial facilities.
- Synthetic vegan leather (PU, PVC) is harder to recycle due to plastic content. Some brands have take-back programs for recycling.
- Upcycling is another option—old vegan leather items can be repurposed into new accessories like wallets or keychains.
To be more eco-friendly, look for plant-based or recycled-material vegan leathers rather than plastic-based options.
What materials are used to make vegan leather?
Vegan leather is made from a variety of natural and synthetic materials, including:
🌱 Plant-Based Materials:
- Pineapple leaves (Piñatex)
- Cactus (Desserto)
- Mushrooms (Mylo)
- Apple peels
- Cork
- Banana fibers
🛠 Synthetic Materials:
- Polyurethane (PU)
- Recycled plastics (from bottles or industrial waste)
- Polyvinyl chloride (PVC) – less eco-friendly
The best vegan leathers are plant-based or made from recycled materials, as they are more sustainable than plastic-based versions.
What are the ingredients in vegan leather?
The ingredients vary depending on the type of vegan leather:
- Plant-Based Leather – Natural plant fibers, bio-based binders (like corn starch or natural resins), plant-based dyes, and protective coatings made from waxes or oils.
- Synthetic Vegan Leather – Polyurethane (PU) or PVC, plasticizers, synthetic dyes, and chemical coatings for texture and durability.
For an eco-friendly choice, look for low-plastic, biodegradable vegan leathers made from plants or recycled materials.
-

 Travel7 months ago
Top 5 Ways Stephen Revetria Elevates the U.S. Travel and Tourism Advisory Board
-

 Crypto8 months ago
Unlock 7 Powerful Cryptocurrency Insights: Delving into NewzNav.com’s Crypto Archives
-
 Technology8 months ago
Hydrogen Water Machines: Revolutionizing Hydration and Wellness
-

 NEWS & Society8 months ago
Church of the Holy Spirit News: Events & Impact
-

 Games8 months ago
Download Tekken 6 PC: A Comprehensive Resource